When it comes to capturing stunning photographs, your iPhone can be a powerful tool. However, many users often overlook the potential of their device’s camera settings. By understanding how to optimize these settings, you can elevate your photography to new heights. In this comprehensive guide, we will delve into the intricacies of adjusting and utilizing various camera settings on your iPhone, empowering you to capture breathtaking, professional-quality images.
1. Harnessing the Power of Exposure Control:
Optimizing exposure for vibrant landscapes:
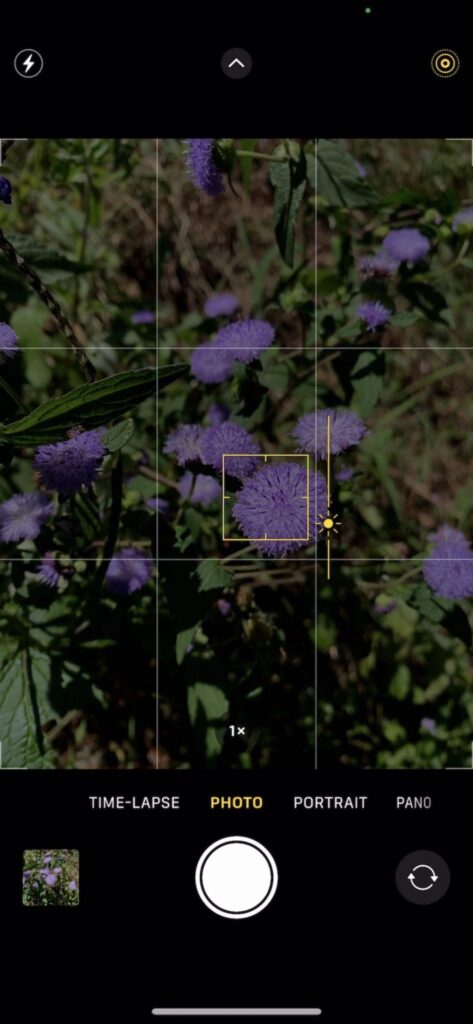
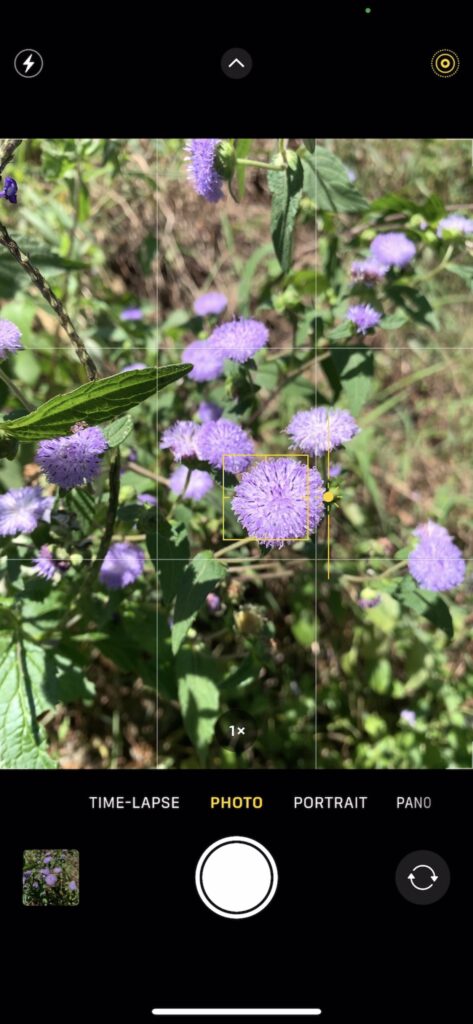
- When capturing landscapes with your iPhone, adjusting the exposure settings is crucial for ensuring that the natural beauty of the scene is accurately represented. By fine-tuning the exposure, you can capture stunning landscapes with vibrant colors and balanced lighting.
- For example, when photographing a sun-kissed mountain range, increasing the exposure slightly can highlight the intricate details of the rugged terrain while maintaining the rich, vivid hues of the sky and the lush greenery below. This technique helps create images that are not only visually striking but also faithful to the natural tones and textures of the landscape, resulting in captivating photographs that evoke a sense of awe and wonder.
Managing exposure in low-light conditions:
- In challenging low-light environments, utilizing exposure control is essential to capture clear and detailed images without sacrificing image quality. By adjusting the exposure settings to accommodate the limited light, you can prevent the occurrence of grainy or blurry results that often arise in such conditions.
- For instance, when photographing a dimly lit interior, reducing the exposure can help maintain clarity and minimize noise, ensuring that even the subtlest details, such as textures and patterns, are preserved with remarkable sharpness and definition. This approach allows you to capture compelling images that retain their clarity and visual appeal, even in the absence of ample lighting, resulting in photographs that are rich in detail and atmosphere.
2. Mastering Focus Techniques for Crisp Imagery:
Utilizing autofocus for dynamic subjects:
- Autofocus is a powerful tool for capturing fast-moving subjects with precision and clarity. When photographing dynamic scenes, such as sports events or wildlife, mastering autofocus allows you to ensure that your subjects remain sharp and in focus, even as they move within the frame.
- For instance, when capturing a sprinting athlete, using autofocus enables your iPhone to continuously adjust the focus, ensuring that each stride and expression is captured with impeccable detail and clarity. This technique empowers you to freeze action and preserve fleeting moments, resulting in compelling and impactful images that convey the energy and excitement of the scene.
Implementing manual focus for creative compositions:
- Manual focus provides a high level of control, allowing you to create artistic and unique compositions that emphasize specific elements within the frame. By manually adjusting the focus, you can achieve selective focus and creative depth of field effects, highlighting your subject while creating a beautifully blurred background.
- For example, when photographing a delicate flower, using manual focus enables you to draw attention to the intricate details of the petals, while softly blurring the surrounding foliage, creating a captivating and visually striking image. This approach encourages artistic expression and allows you to craft photographs that evoke emotion and convey a sense of intimacy, resulting in images that are not only visually appealing but also narratively compelling.
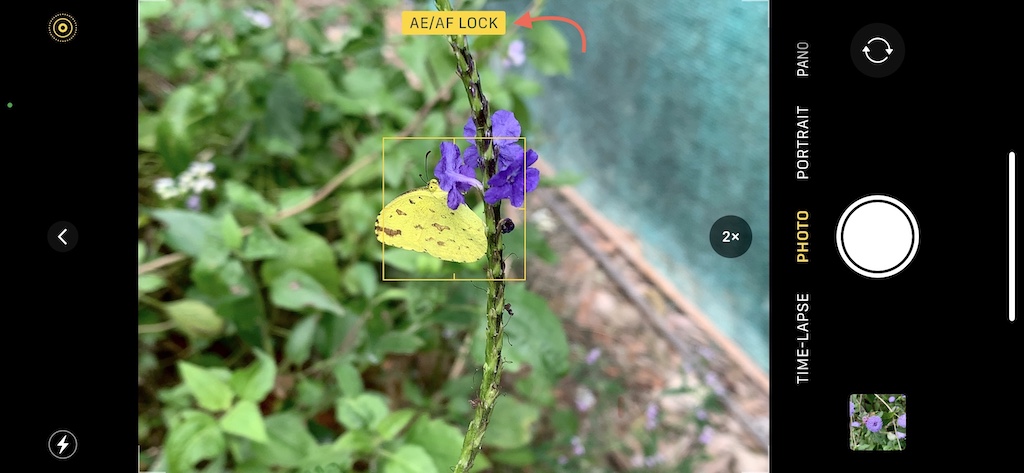
AE/AF Lock (Static Focus)
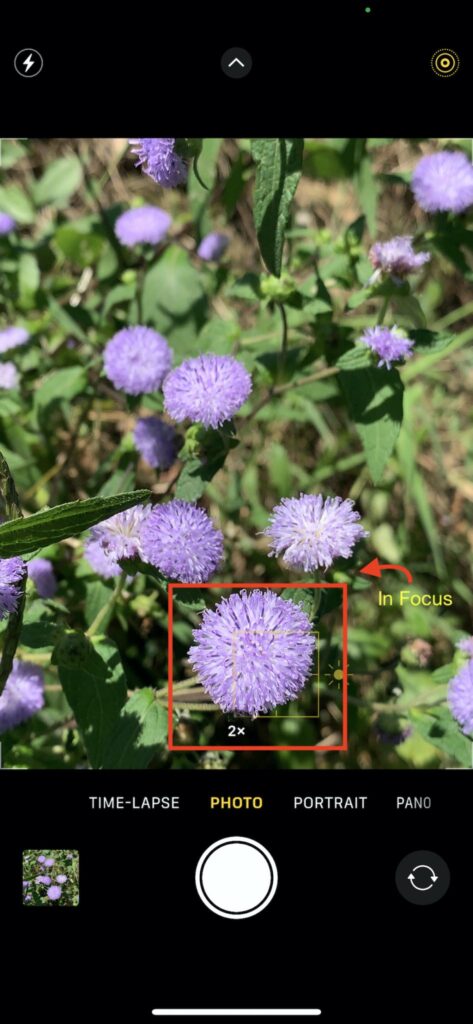
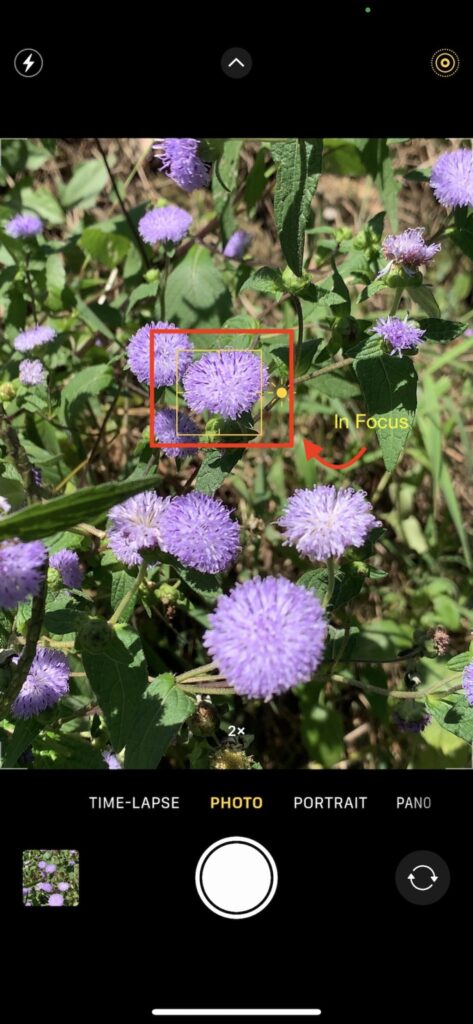
- AE/AF (Auto Exposure/Auto Focus) lock is a crucial feature in the iPhone camera app that allows users to maintain consistent exposure and focus settings for specific scenes or subjects. By tapping and holding on the screen where you want to set the focus and exposure, the AE/AF lock freezes these settings, ensuring that subsequent shots retain the same focus and exposure levels, even if the camera or the subject moves.This feature is particularly useful in situations where the lighting or the subject’s position remains constant but the composition changes. AE/AF lock empowers users to have greater control over their compositions and ensures that the intended exposure and focus settings are maintained, allowing for more precise and intentional photography.
- For example, when capturing a portrait in varying lighting conditions, using AE/AF lock on the subject’s face ensures that the exposure and focus remain constant, resulting in consistently well-exposed and sharp portraits regardless of any background changes. Similarly, in scenarios where you want to create a series of shots with uniform exposure and focus, such as capturing multiple images of a static object, utilizing AE/AF lock guarantees a seamless and consistent visual narrative throughout the series.
- For instance, when photographing a flower, tapping and holding on the focal point of the flower allows you to lock the focus, ensuring that even the tiniest details, like the delicate textures of the petals or the subtle hues of the stamen, are captured sharply and vividly. This feature is also invaluable for shooting moving subjects, as it enables you to maintain focus even as the subject changes position within the frame, resulting in clear and crisp images, free from any blurriness or distortion.
3. Exploring White Balance and HDR:
Utilizing white balance for accurate colors:
- White balance settings on your iPhone allow you to adjust the color temperature to ensure accurate color representation in various lighting environments.
- For example, when shooting indoors under fluorescent lighting, adjusting the white balance to the appropriate setting prevents the image from appearing overly cool or warm, resulting in natural-looking colors and lifelike tones that accurately reflect the scene’s ambiance.
Harnessing HDR for dynamic range:
- HDR (High Dynamic Range) mode on your iPhone enables you to capture images with a more extensive range of light and shadow, preserving details that would otherwise be lost in standard photographs. When photographing landscapes with stark contrasts between bright skies and dark foregrounds, enabling HDR mode helps to balance the exposure, resulting in a well-exposed image that showcases both the intricate details in the shadows and the subtle nuances in the highlights. By utilizing HDR, you can create visually captivating photographs with enhanced depth and richness, ensuring that every element in your composition is captured with exceptional clarity and vibrancy.
- How to turn on HDR on iPhone?
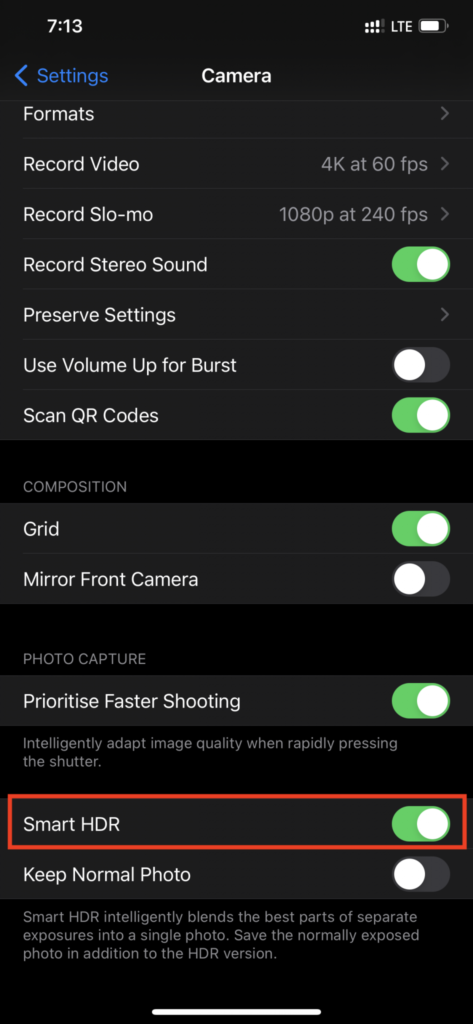
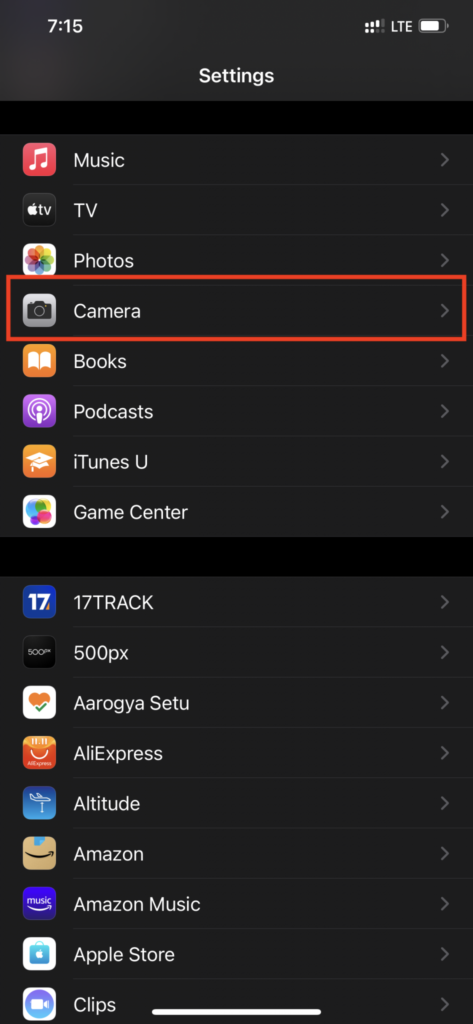
To turn on HDR (High Dynamic Range) on an iPhone, follow these steps:
- Open the “Settings” app on your iPhone.
- Scroll down and find the “Camera” option.
- Tap on “Camera” to open the Camera settings.
- Locate the “Smart HDR” or “Auto HDR” option, depending on your iPhone model and iOS version.
- Toggle the switch to enable HDR.
- How do you use HDR on iPhone?
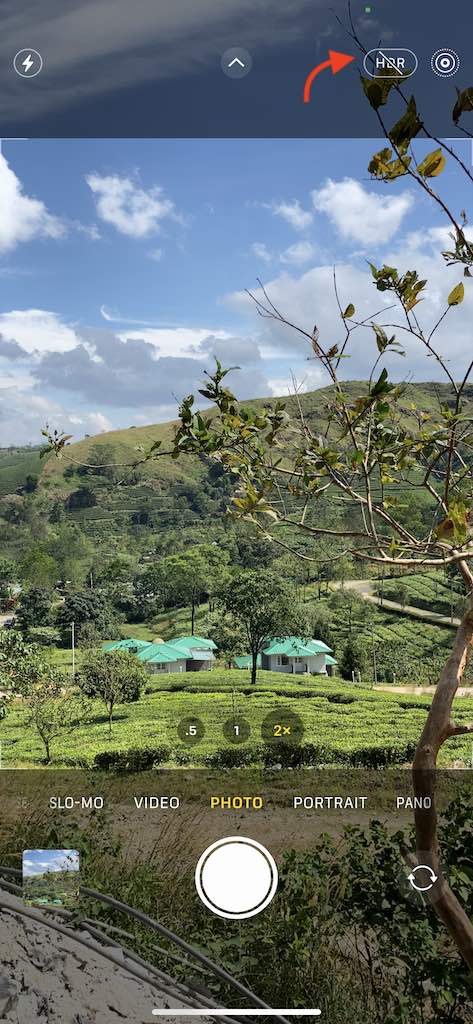
To use HDR (High Dynamic Range) on an iPhone, follow these simple steps:
- Open the Camera app on your iPhone.
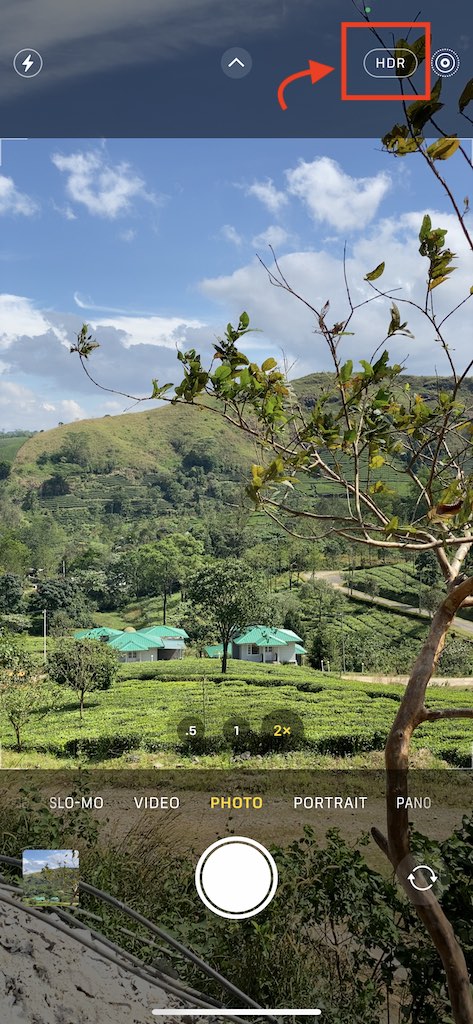
- Locate the HDR icon on the top of the screen. It may appear as “HDR” or “Auto” depending on your iPhone model and iOS version.
- Tap the HDR icon to enable HDR mode. When activated, the HDR icon typically turns yellow.
- Aim your iPhone at the scene you want to capture.
- Hold the phone steady and press the shutter button to take the photo.
4. Maximizing Grid and Composition:
Leveraging the grid for balanced composition:
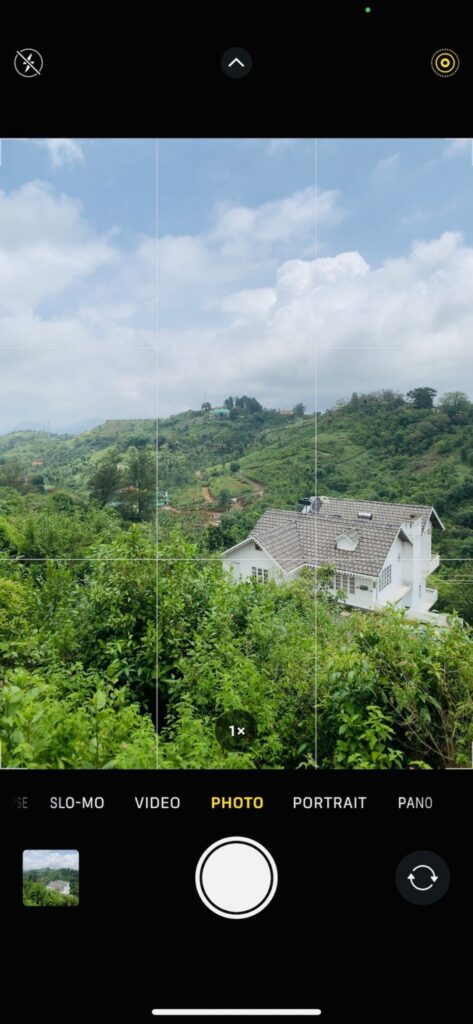
- The grid feature on your iPhone camera serves as a valuable tool for achieving balanced and visually appealing compositions. By enabling the grid, you can align your subjects and elements within the frame more effectively, ensuring that they adhere to the principles of balance and symmetry.
- For example, when photographing a landscape, you can use the grid lines to position the horizon along the upper or lower third of the frame, creating a harmonious balance between the sky and the land. This technique helps to produce well-composed and aesthetically pleasing images that draw the viewer’s eye to the focal points with a sense of equilibrium and order.

Implementing the rule of thirds for dynamic shots:
- The rule of thirds is a fundamental principle in photography that involves dividing the frame into a 3×3 grid, creating nine equal parts. By placing your subject or key elements along the intersections or along the grid lines, you can add depth and interest to your images, making them more visually engaging and dynamic.
- For instance, when capturing a portrait, positioning the subject slightly off-center along one of the intersecting points rather than in the center of the frame can create a more compelling composition that draws the viewer’s attention and adds a sense of movement and narrative to the photograph. Incorporating the rule of thirds in your compositions can help you create images that are not only visually striking but also artistically balanced and captivating.

5. Optimizing Flash and Portrait Mode:
Controlling flash for natural lighting effects:
- When it comes to using the flash on your iPhone, it’s essential to aim for natural-looking lighting, particularly in low-light environments. By adjusting the flash settings, you can avoid harsh shadows and overexposure that often result from direct, intense flashes.
- For instance, when taking a close-up shot of an object indoors, utilizing the “Auto” flash setting can help soften the lighting, preventing stark contrasts and maintaining a more natural ambiance. This approach ensures that the subject is well-lit without compromising the overall mood and tone of the photograph, resulting in a more visually pleasing and authentic representation of the scene.
Enhancing portraits with Portrait Mode:
- The Portrait Mode feature on the iPhone enables you to capture striking, professional-looking portraits with a beautifully blurred background, also known as the bokeh effect. By activating Portrait Mode, you can emphasize your subject while creating a soft, artistic background that adds depth and visual interest to the image.
- For example, when photographing a person against a busy cityscape, enabling Portrait Mode helps to isolate the subject, making them stand out prominently while creating a dreamy, defocused background that accentuates their presence. This feature is particularly effective for creating visually compelling portraits that evoke a sense of intimacy and focus, elevating your photography to a more professional and polished level.


6. Enhancing Creativity with Special Modes and Filters:
Exploring panoramic mode for immersive landscapes:
- The panoramic mode on your iPhone offers a unique opportunity to capture expansive landscapes and cityscapes with a wide and immersive perspective. By experimenting with panoramic mode, you can create breathtaking, sweeping images that encompass the vastness and grandeur of the scene.
- For example, when photographing a picturesque mountain range, utilizing panoramic mode allows you to seamlessly stitch together multiple frames, capturing the panoramic vista in all its majestic splendor. This feature enables you to convey the sheer scale and beauty of the landscape, providing viewers with an immersive and awe-inspiring visual experience that transports them directly into the heart of the scene.

Applying creative filters for artistic expression:
- Filters are a powerful tool for adding artistic effects and enhancing the mood and tone of your images, allowing for creative and personalized expression in your photography. By learning how to apply filters, you can infuse your photographs with a distinctive aesthetic, whether it’s to evoke nostalgia, add a vintage feel, or enhance the vibrancy of colors.
- For instance, applying a black and white filter to a portrait can create a timeless and emotive effect, emphasizing the subject’s expressions and features with dramatic contrast and depth. Similarly, using a vibrant filter for a landscape shot can intensify the natural hues and textures, resulting in an image that is vivid and visually striking. By incorporating creative filters into your photography, you can add a layer of artistic interpretation and emotional resonance to your images, transforming them into captivating visual narratives that resonate with your unique creative vision.
7. Using Apps Improve Photography Skills:
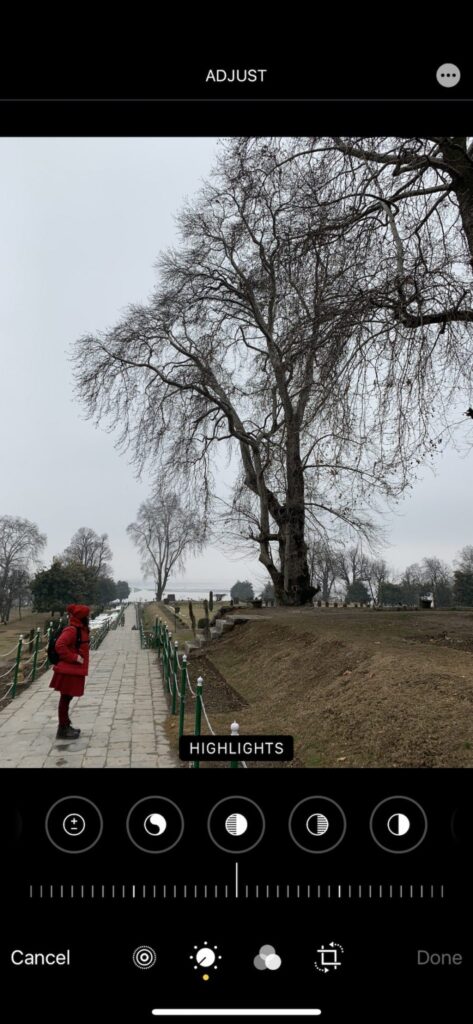
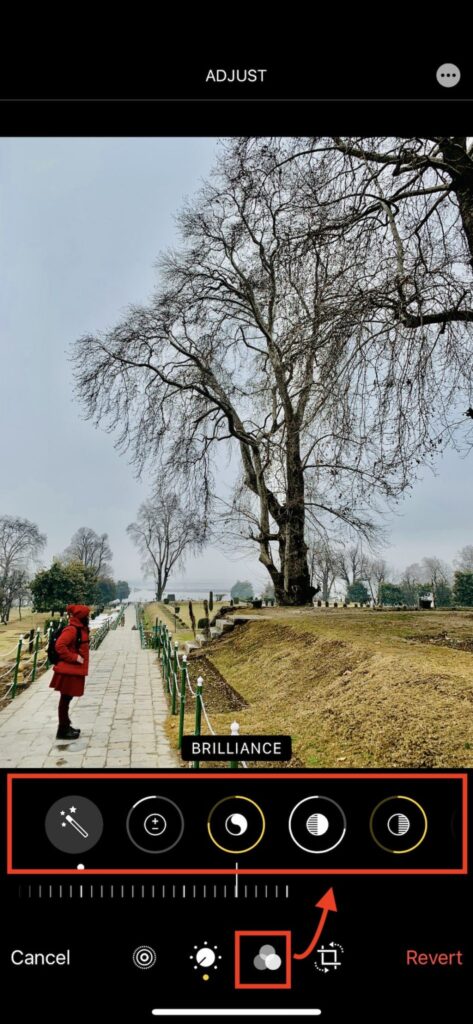
Understanding the details behind a photograph is crucial for refining your photography skills. EXIF Viewer by Fluntro app can provide comprehensive metadata, including camera settings, exposure details, and geolocation data, allowing you to analyze successful shots and identify areas for improvement. By dissecting the EXIF data, iPhone photography users can gain valuable insights into their shooting techniques, enabling them to make informed adjustments and elevate their photography prowess.
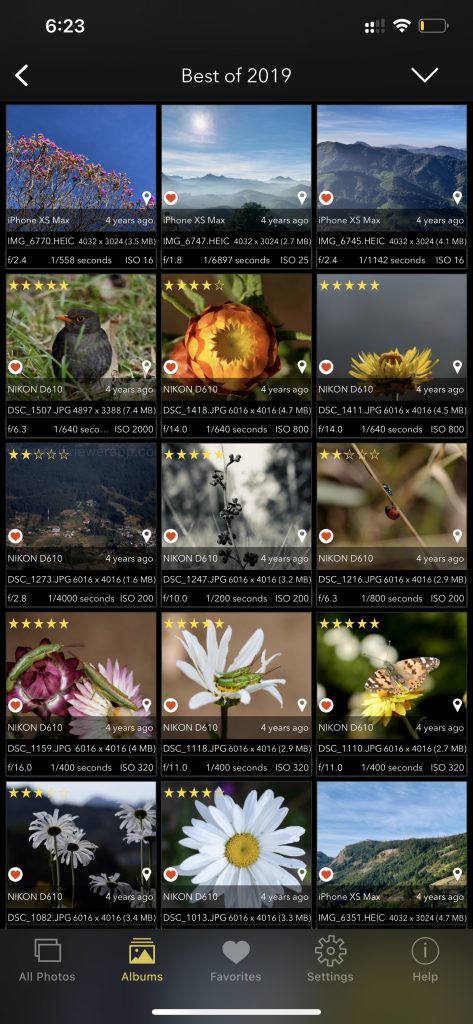
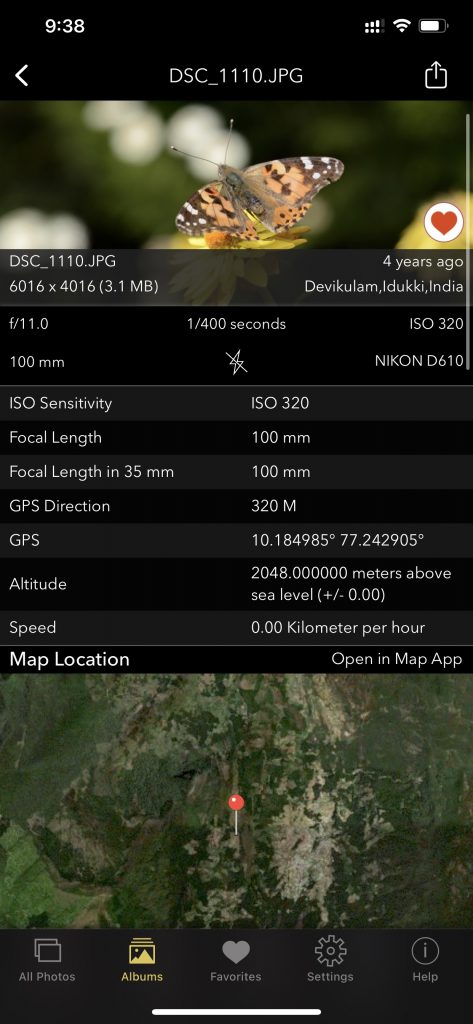
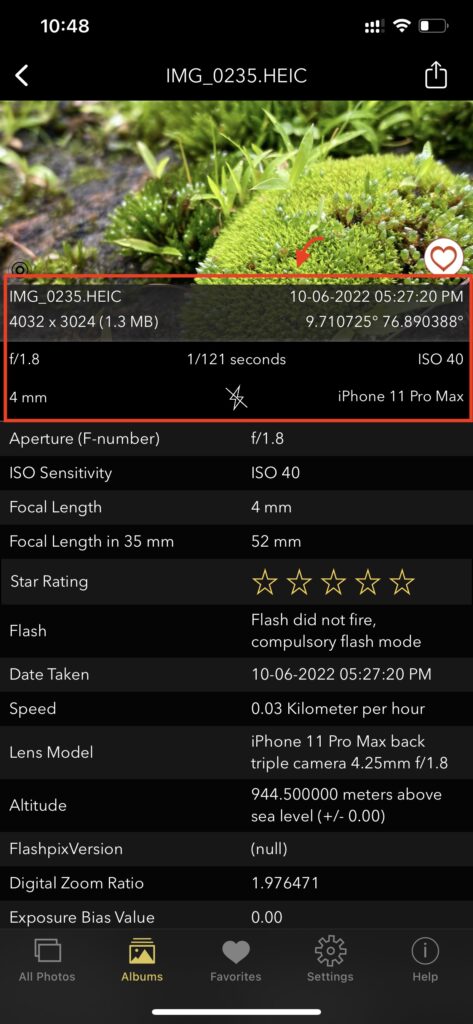
Screenshot of EXIF Viewer App images showing 30+ exif metadata
Appstore Link: – https://apps.apple.com/us/app/exif-viewer-by-fluntro/id944118456
- View EXIF Data: Quickly access the EXIF tags of your Photos and Videos, providing essential information about camera settings, location data, and more.
- Remove EXIF Data: Safeguard your privacy by easily removing EXIF metadata before sharing Photos and Videos on social media or other platforms.
- Edit EXIF Data: Modify incorrect details like date and time, ensuring accurate image information.
- Geolocation Details: Instantly view, remove and edit Geotagging – GPS location, GPS coordinates, altitude, and direction with advanced features.
- iOS and iCloud Integration: Access EXIF metadata across your iOS devices and iCloud seamlessly.
- Photo EXIF Tags: Discover essential EXIF data, including ISO, Shutter Speed, Focal Length, Camera Model, lens model, Aperture, Photo Keywords and more.
- Image Details: Access information such as image DPI, height, and width on your iPhone and iPad.
- High-Resolution Image Viewing: Seamlessly zoom in on high-resolution photos of up to 80 MB with exceptional clarity.
- Date Format Options: Customize date formats to your liking for a convenient viewing experience.
- Privacy Control: Effortlessly conceal photos without EXIF metadata for enhanced privacy.
- EXIF Viewer Photos Extension: Access EXIF data directly from the native Photos app or other third-party apps.
- Flexible Sharing: Easily share images with options to include or exclude EXIF metadata.
- Copy to Clipboard: Copy EXIF data to the clipboard for convenient sharing across multiple applications.
- Metadata Retention: Learn how the app retains EXIF metadata while sending photos through Mail, AirDrop, and other sharing methods.
To Download App:
- Visit the App Store on your iPhone or iPad.
- Search for “EXIF viewer by Fluntro“.
- Download and install the app. EXIF Viewer app allows you to View, Remove and Edit image and video metadata.
Checkout the preview video of Exif Viewer by Fluntro: