How to Add Geotags to Photos ?
Adding photo geotags allows you to record the location where the photo was taken, which can be useful for sharing and documenting your images.
By Sneha MohithUpdated 5 min read
Adding geotags to photos allows you to record the location where the photo was taken, which can be useful for organizing, sharing, and documenting your images. Here’s a general guide on how to add geotags to photos using different software and devices:
1. Using a GPS-Enabled Camera:
- Many modern digital cameras, especially DSLRs and mirrorless cameras, come equipped with GPS functionality that can automatically add geotags to photos as you capture them. To use this feature:
- Check your camera’s user manual to learn how to enable the GPS function.
- Ensure that your camera has a clear view of the sky to acquire GPS satellite signals.
- Take photos as usual, and the camera will embed the GPS coordinates into the Exif metadata of each image.
2. Using a Smartphone:
- Most smartphones have built-in GPS and can geotag photos without the need for additional hardware or software. To geotag photos with your smartphone:
- Enable location services or GPS in your phone’s settings.
- Open the camera app and take a photo. The GPS coordinates will automatically be added to the photo’s metadata.
3. Using Photo Editing Software:
- If your photos don’t have geotags, you can manually add them using photo editing software like Adobe Lightroom, Adobe Photoshop, or free alternatives like GIMP:
- Import your photos into the software.
- Look for the option to add location data or geotags. In Lightroom, for example, you can use the Map module to drag and drop photos onto the map.
- Alternatively, you can enter the GPS coordinates manually for each photo.
- Save or export the photos, and the geotags will be embedded in the Exif metadata.
4. Using Dedicated Geotagging Software:
- There are dedicated geotagging software applications available, such as GeoSetter (Windows) or HoudahGeo (macOS), which make it easy to add geotags to your photos:
- Import your photos into the geotagging software.
- Use the software’s interface to assign GPS coordinates to your images either by matching with tracklogs or by manually selecting locations on a map.
- Save or export the geotagged photos.
5. Using Mobile Apps:
Examples EXIF Viewer by Fluntro is an iOS app that allows you to view and edit Exif metadata, including geotags, in your photos. Here’s a general guide on how to geotag a photo using the EXIF Viewer by Fluntro app:
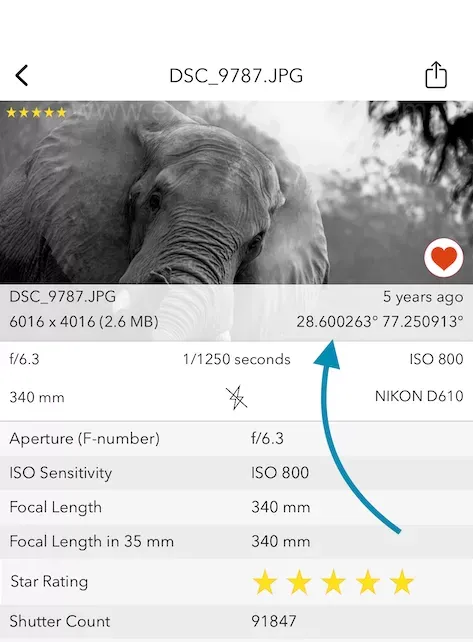
How to geotag a photo using EXIF Viewer by fluntro?
2. Open the App: Launch the EXIF Viewer app on your iPhone or iPad.
3. Select single/multiple Photos: Select the photo you want to geotag.
4. Edit Geotags:
- To add or edit geotags:
- Tap “Edit EXIF“. If there is already geotag information, it will display the current coordinates.
- Tap the “Edit” or “Add” option, which will allow you to manually enter the GPS coordinates for the location where the photo was taken. You can also use the map feature to select the location visually.
- Save the changes when you’re done.
5. View the Geotagged Photo:
- The photo will now have the new geotag information embedded in its Exif metadata. These images will be saved into a new Album “Exif Edited” in iOS Photos App “My Album”.
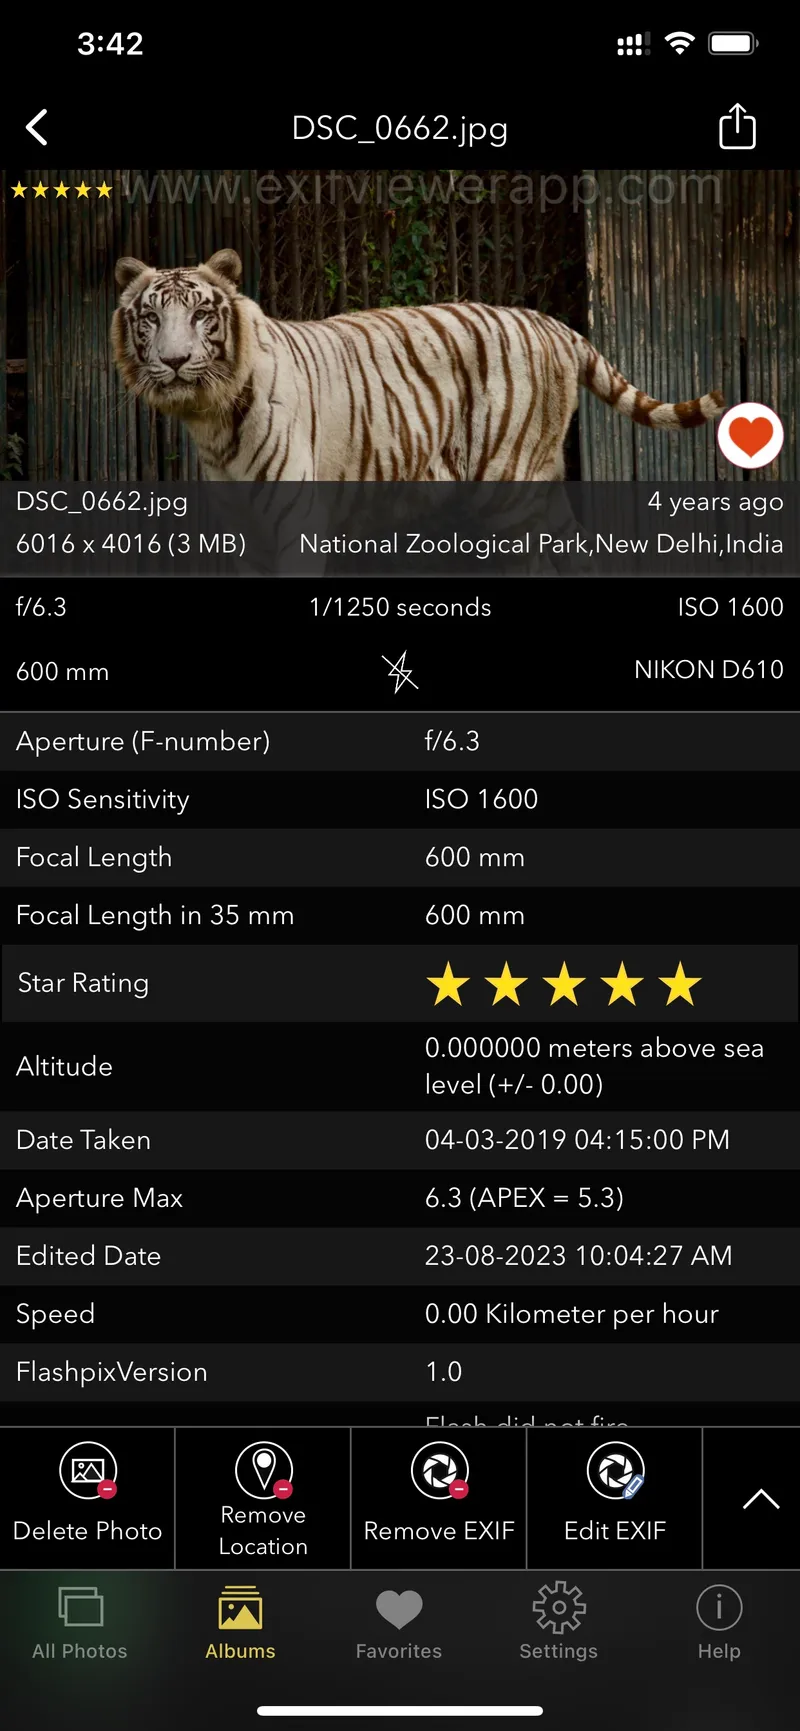
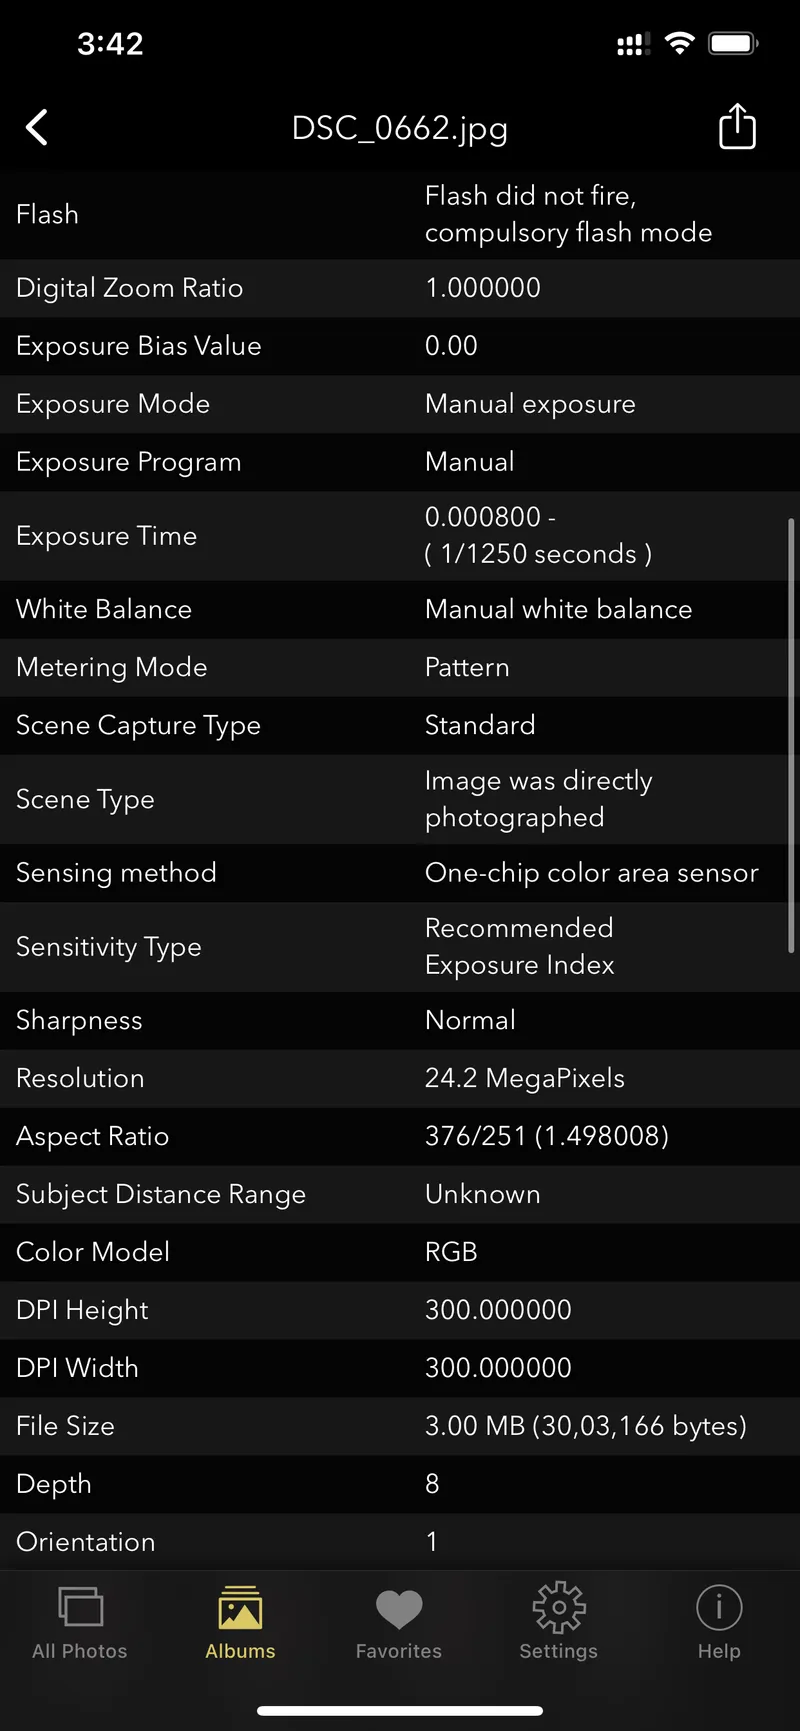
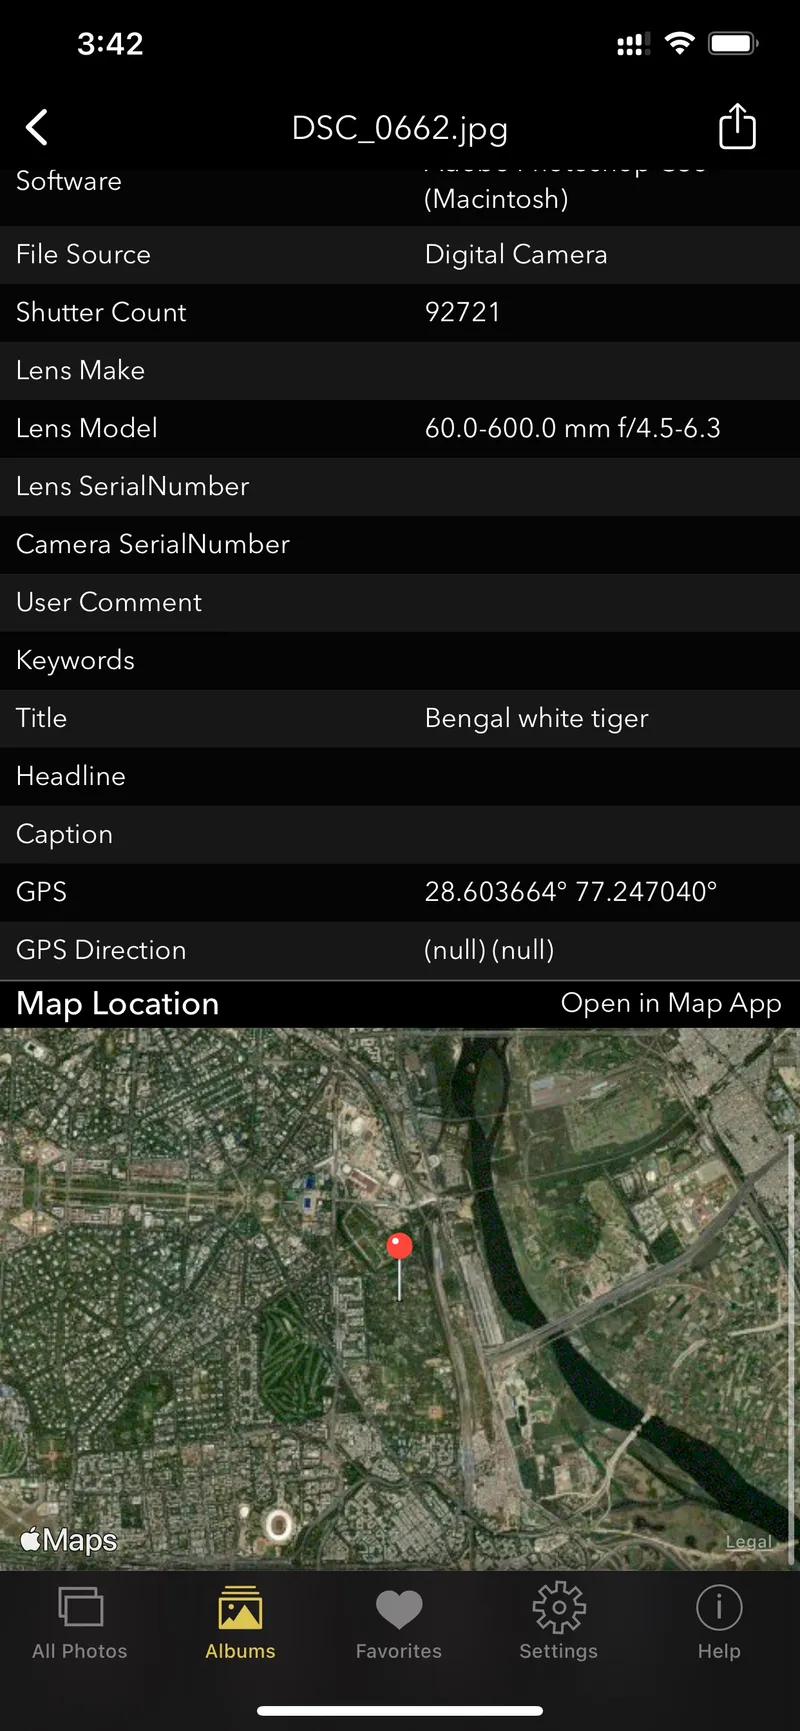
On iOS: Screenshot of EXIF Viewer by Fluntro app displaying detail view of all exif information of a photo
Checkout the preview video of Exif Viewer by Fluntro:
![Photography App - EXIF Viewer by Fluntro for iPhone and iPad [Promo Video]](https://i.ytimg.com/vi/ycz0b0uDn9A/hqdefault.jpg) ▶Photography App - EXIF Viewer by Fluntro for iPhone and iPad [Promo Video]
▶Photography App - EXIF Viewer by Fluntro for iPhone and iPad [Promo Video]
How to Geotag Photos Already Taken
Geotagging is a valuable feature that embeds location information into your photos, allowing you to organize and track where each picture was captured. However, not all photos come with geotags, especially if the camera or phone’s location services were turned off when the photo was taken. The good news is, you can add geotags to existing photos using various apps or software tools.
Here’s how you can geotag your photos manually, whether you’re using a Mac, iPhone, or third-party tools.
1. Geotagging Photos on iPhone using the Photos App
If you’re an iPhone user, Apple Photos makes it easy to add location data to your photos:
-
Open the Photos app on your iPhone.
-
Select the photo you want to geotag.
-
Tap the “i” button (information icon) at the bottom.
-
If the photo doesn’t have a location, you’ll see a link to Add Location. Tap on this.
-
Enter the location manually or choose a suggested location from the list.
-
The location is now added to the photo’s metadata.
2. Geotagging Photos on Mac using the Photos App
On a Mac, you can also add location data to your photos with the built-in Photos app:
-
Open the Photos app on your Mac.
-
Select the photo(s) you want to geotag.
-
Click the (i) button in the upper-right corner to open the info pane.
-
Click on the Add Location field.
-
Type in the location name or select a location from the list of suggestions.
-
The new location will be added to the photo’s EXIF metadata.
3. Geotagging Photos Using EXIF Viewer by Fluntro
For those who need to add or edit geotags in batches, the EXIF Viewer by Fluntro app simplifies the process. Here’s how you can add geotags to existing photos with the app:
-
Download and open the EXIF Viewer by Fluntro from the App Store.
-
Import the photos you want to geotag.
-
Select the photo and tap on the Edit Location feature.
-
Use the interactive map or enter the location details manually.
-
Save the changes, and the new geotag will be embedded in the photo’s EXIF metadata.
For photographers who use Lightroom to manage their photo collections, geotagging is also possible directly from the software:
-
Open Lightroom and import the photos you want to edit.
-
Go to the Map module.
-
Drag and drop your photo(s) onto the map to add geolocation data.
-
The location will be saved automatically to the image’s metadata.
Why Geotagging Matters
Adding geotags to your photos has several advantages:
Easy Photo Organization: You can sort and organize photos by location, making it easier to find them later.
Social Sharing: Apps like Instagram or Google Photos automatically include geotags when you share photos, providing a richer context to your posts.
Memory Tracking: Geotags help you remember where a photo was taken, which is particularly useful for travel photography.
By following these methods, you can easily geotag your existing photos, making them more organized and informative. If you’re looking for a quick way to view, edit, or add geotags, EXIF Viewer by Fluntro offers a seamless solution.